You can can learn more about Ledger Quest via the official website at quest.ledger.com.
Before you start
- Set up Ledger Live with your device.
- Update the firmware on your Ledger device for your Ledger Nano S / Nano S Plus / Nano X.
Video instructions
Install the Polygon (MATIC) app on your Ledger device
- Open Ledger Live and navigate to the My Ledger tab.
- Connect and unlock your Ledger device.
- If asked, allow My Ledger to access your device.
- Search for the Polygon (MATIC) app in the app catalog.
- Click the Install button to install the app on your Ledger device.
- Your Ledger device displays Processing.
- Ledger Live displays Installed.
Create a Polygon (MATIC) account
- Open Ledger Live.
- Connect and unlock your Ledger device.
- Navigate to the Accounts tab, click the Add account button, select Polygon (MATIC), and click Continue.
- When prompted open the Polygon app on your Ledger device using the buttons.
- Name your Polygon account then click Add account
- Click Done to finalize adding your account to Ledger Live.
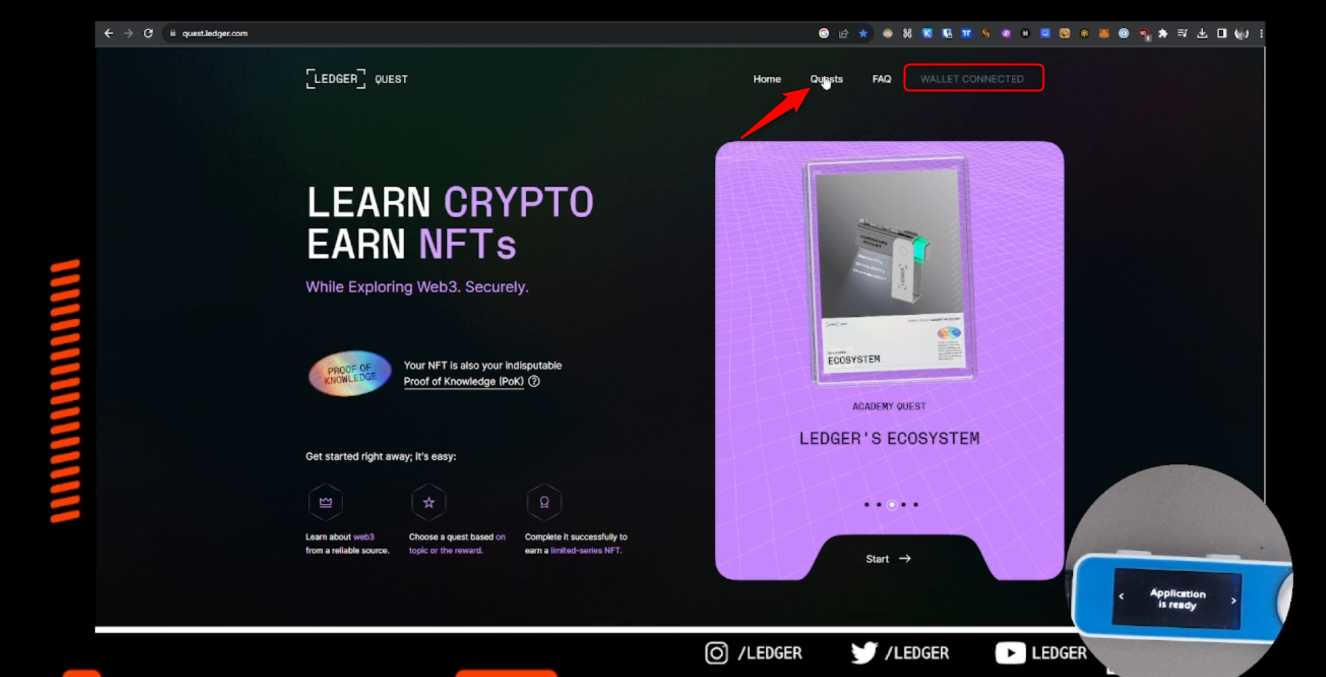
Connect your account to Ledger Quest
- Unlock your Ledger device using your PIN.
- Go to quest.ledger.com. Once there, click on Connect your wallet and choose Ledger Connect.
- Select Connect with Ledger Live desktop.
- Click on Open Ledger Live.
- In Ledger Live, select your Polygon account and click Connect.
- Click on Continue.
- Using the device buttons, review the message displayed on your Ledger. If everything appears accurate, navigate to Sign message. To sign the message, press both buttons on your Ledger device simultaneously.
- You're all set! Return to the quest website. You'll see Wallet connected in the top right corner, confirming that your Ledger device has successfully connected
Navigate to the Quest tab to begin. Enjoy your questing!